Saturday, April 19, 2014

Hop Skip Jump Kids Blog Hop

Kids Blog Hop
This Kids Prize Pack features goodies like our Little Man and Little Girl Paper Pads, our favorite kid-themed 3D StickersCardstock Stickers, and even our fun & tactile Puffy Stickers (and more – it's a $60 value!) This prize pack is not only perfect for making scrapbook pages of your little Monsters andPrincesses, but it's also great for crafting up kid-friendly cards and Pinterest-worthy projects!
And to take the fun up another level, we're also giving away Little Man or Little Girl Paper Pads to (5) Runners-Up! That's right – 6 winners for one contest! We like those odds!
There are a few ways to enter - the first two are freebies by liking us on Facebook and signing up to receive Facebook notifications from us (we don't want you to miss any of our great project posts!). But the big entry comes from commenting on each of our designers' posts! If you do, you'll get +10 entries into our drawing! That sounds like a deal!

Here is my take on the challenge


Kids' Blog Hop Designers
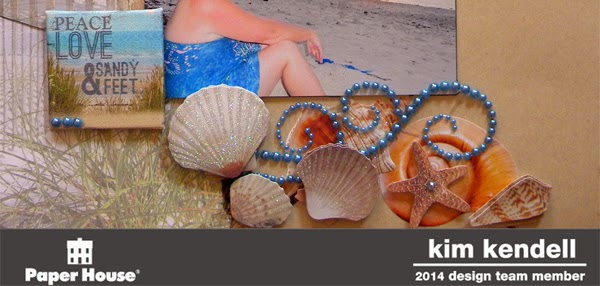
Kim Kendell you are here
Make sure to hop through each designer down the list to be eligible for the most entries! When you're done, just hop back here and let us know! The hop will be running all weekend, so you have until Sunday at 11:59pm EST to get your entries in!


Monday, April 14, 2014

I am not a person that takes lots of photos for Easter so I had to think of what i could do for Flourish With A Bling so an Easter bag it was I love how the bling has just lifted the colours in the paper and from the flowers.
I have used the following Flourish With A Bling Luke Flourish and over laid with the Chloe Flourish.

Friday, April 11, 2014

Who's A Rock Star with Paper House Productions

Today I am sharing another of my Paper House Production DT LO's today is a LO usingthe Rock Star Collection when I saw this pack I just knew I had the perfect photo of my brother playing with Gun's and Roses to use and how well did the paper work with it. I love the foil in the paper and the way it lefts the LO.


Instructions for Rock Star LO
Requirements
2 sheets of the 12 x 12 winged paper from a Night Out Paper pad
1 packet of 3D Rock Star Stickers 
1 packet of Rock Star cardstock stickers

Tools 
Normal tool kit
black Ink

Steps 
1. take your 2 12 x 12 pages ink the edges on one with the other cut the wings out as well as the flower in the center of the wings ink edges.
2. using foam tape mount the wings and the flower over the top of the ones on the 12 x 12 sheet.
3. on the cardstock sheet take the 12 inch strop of lights and adhere to the top of you page
4. Add your photo as per image of LO
5. using the 3D stickers embellish as per image of LO.
6. You are now finished your LO

Thank you for calling bye Kim   

Saturday, April 5, 2014

Paper House Production DT Layout

This is another of my Paper House Production DT layouts and I have chosen the Beach Collection to use for my LO the embellishments.

I think that the papers are just so awesome to use and made for the feel of this LO.


I also love the 3D stickers as they add beautiful dimension to the LO look at how good the shells are below and the amazing little canvas sticker with the quote is just so different.


Here are my instructions on how to recreate my layout.
Beach Comber LO
Requirements 
1 x Beach Post 12 x 12 Paper
1 x packet beachcomber 3D stickers
1x Packet Beach Art Canvas Stickers
1 x Packet Beach Cardstock Stickers
1 x Packet Beach Die Cut Stickers
1 x Kraft cardstock
1 x Blue bling flourish

Photo Requirements

1 x6”x4” landscape photo

Tools

1 x Brown ink pad
Normal tool kit

Steps

1. Take the kraft cardstock and ink edges with brown ink
2. Take the Beach post Paper and tear down the left hand side approx. 4 inches in now ink all edges. Take the remaining piece and cut out some of the fence and the sign post see image of LO as a guide. Then ink all edges.
3. Take the cardstock and adhere the torn paper to the left hand side but make sure that under the torn side you take the border strip of shells from the cardstock stickers sheet and adhere that partially under the torn edge see image of LO as a guide. Then adhere the fence and sign post as per image of LO.
4. Now adhere your photo under the sign post
5. Take the quote from the canvas stickers and also add to the bottom left of your photo
6. Take your die cut stickers and add 2 large shells as per image of LO
7. Take the Beachcomber 3D stickers and add the beachcomber sticker over the beach sign post and then add dome of the shells over the sticker shells as per image of LO.
8. Your LO is now complete, I hope you like.  

Thank you for looking Kim

LinkWithin

Related Posts with Thumbnails